
Pastel pencils and pastelmat paper
Challenge
One of the biggest challenges when working with even the best soft pastel pencils is that they are incredibly tough to control, especially if you want to have fine lines and details in your artwork.
Their crumbly and chalky nature forces to think about the medium quite differently compared to others that they may have worked with in the past.
Now sure, you could go with a hard pastel, which is essentially just the same thing as a soft pastel, just a different binder to pigment ratio, hard pastels have much more binder and much less pigment – but you will still have problems with the pigment transferring on to your hands, obtaining a reliably fine point for detailed work, and even the occasional breakage of the stick when making highly expressive artwork.
Technical
To get technical for a moment, pastel pencils are a form of pastel encased in wood (as with most pencils). To give it colour, the pastel core contains pigment, and it also contains binders (usually including chalk) for body. This element is what differentiates the pastel pencils from regular pencils.
5 tips for using pastel pencils.
There are many of you that haven’t discovers pastel pencils yet and some are just starting so here is to use it.
*Don’t use to many colors when you are a starter
Avoid using many colors on top of each other. This is common for beginners when starting out with the pastel pencil medium. There is sometimes an indecision as to what colour to use so the answer is they use them all. The result is that all these colors merge together and produce a muddy appearance.
*Use mid tones to get dark colors
Never apply dark colors directly on top of light colors. The effect of this would be that te dark color would make the effect you are trying to achieve too harsh. If you are needing a dark tone, you do not need to lay a light tone first. A medium tone would work better under the dark color.
*Don’t press too hard
The ideal use of the pastel pencils is layering one color onto another to produce the spectacular effects we want to achieve. But if each layer of pastel is applied with a heavy hand, then the result would be that the pastel paper is likely to be crushed. Once this happens it produces a shine that is difficult if not impossible to add more pastel on top.
*Sharp pencils
Keep the pastel pencils only sharp for detailed areas. Our pastel pencil work relies on producing fine detail from time to time and for this to work well you need to use a sharp pencil. A good case in point is when applying whiskers to an animal portrait. Very often you would need to travel a white pastel pencil into and over other dark colors. If the white pencil is not sharp, the blunt point makes the job difficult not to mention unsightly.
*Work from light to dark
Work from light to dark as a rule. The reasons for this are that the pastel pencils never dry and are also translucent Wich means they are see through (to a certain extent). Working this way means the color build up is much more acceptable as each stronger tone has a cushion to work into. If you apply strong colors first then try to add light colors on top, the result is a muddy mess. This must be practiced; however, you can work light into dark if you know what you are doing or already have some experience using the pastel pencils.
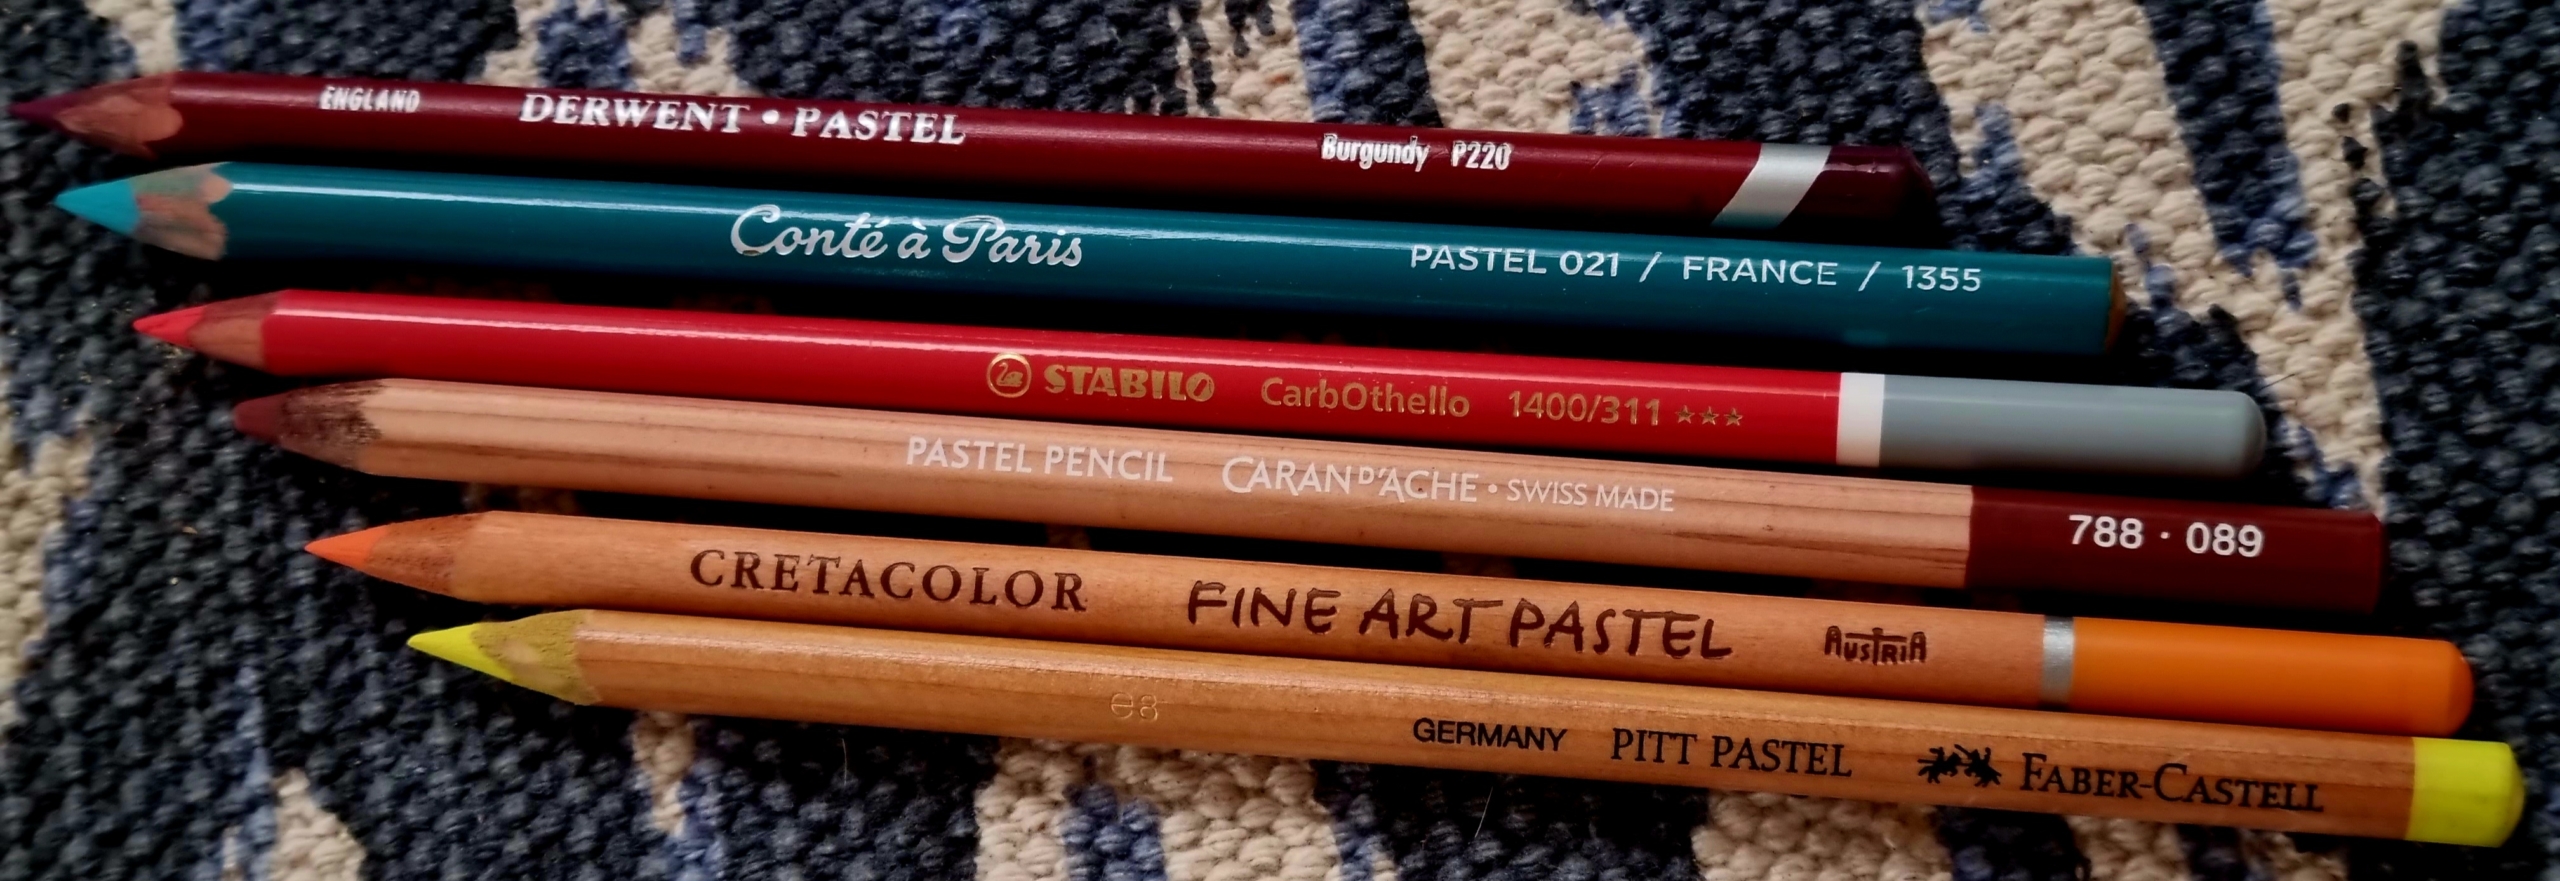
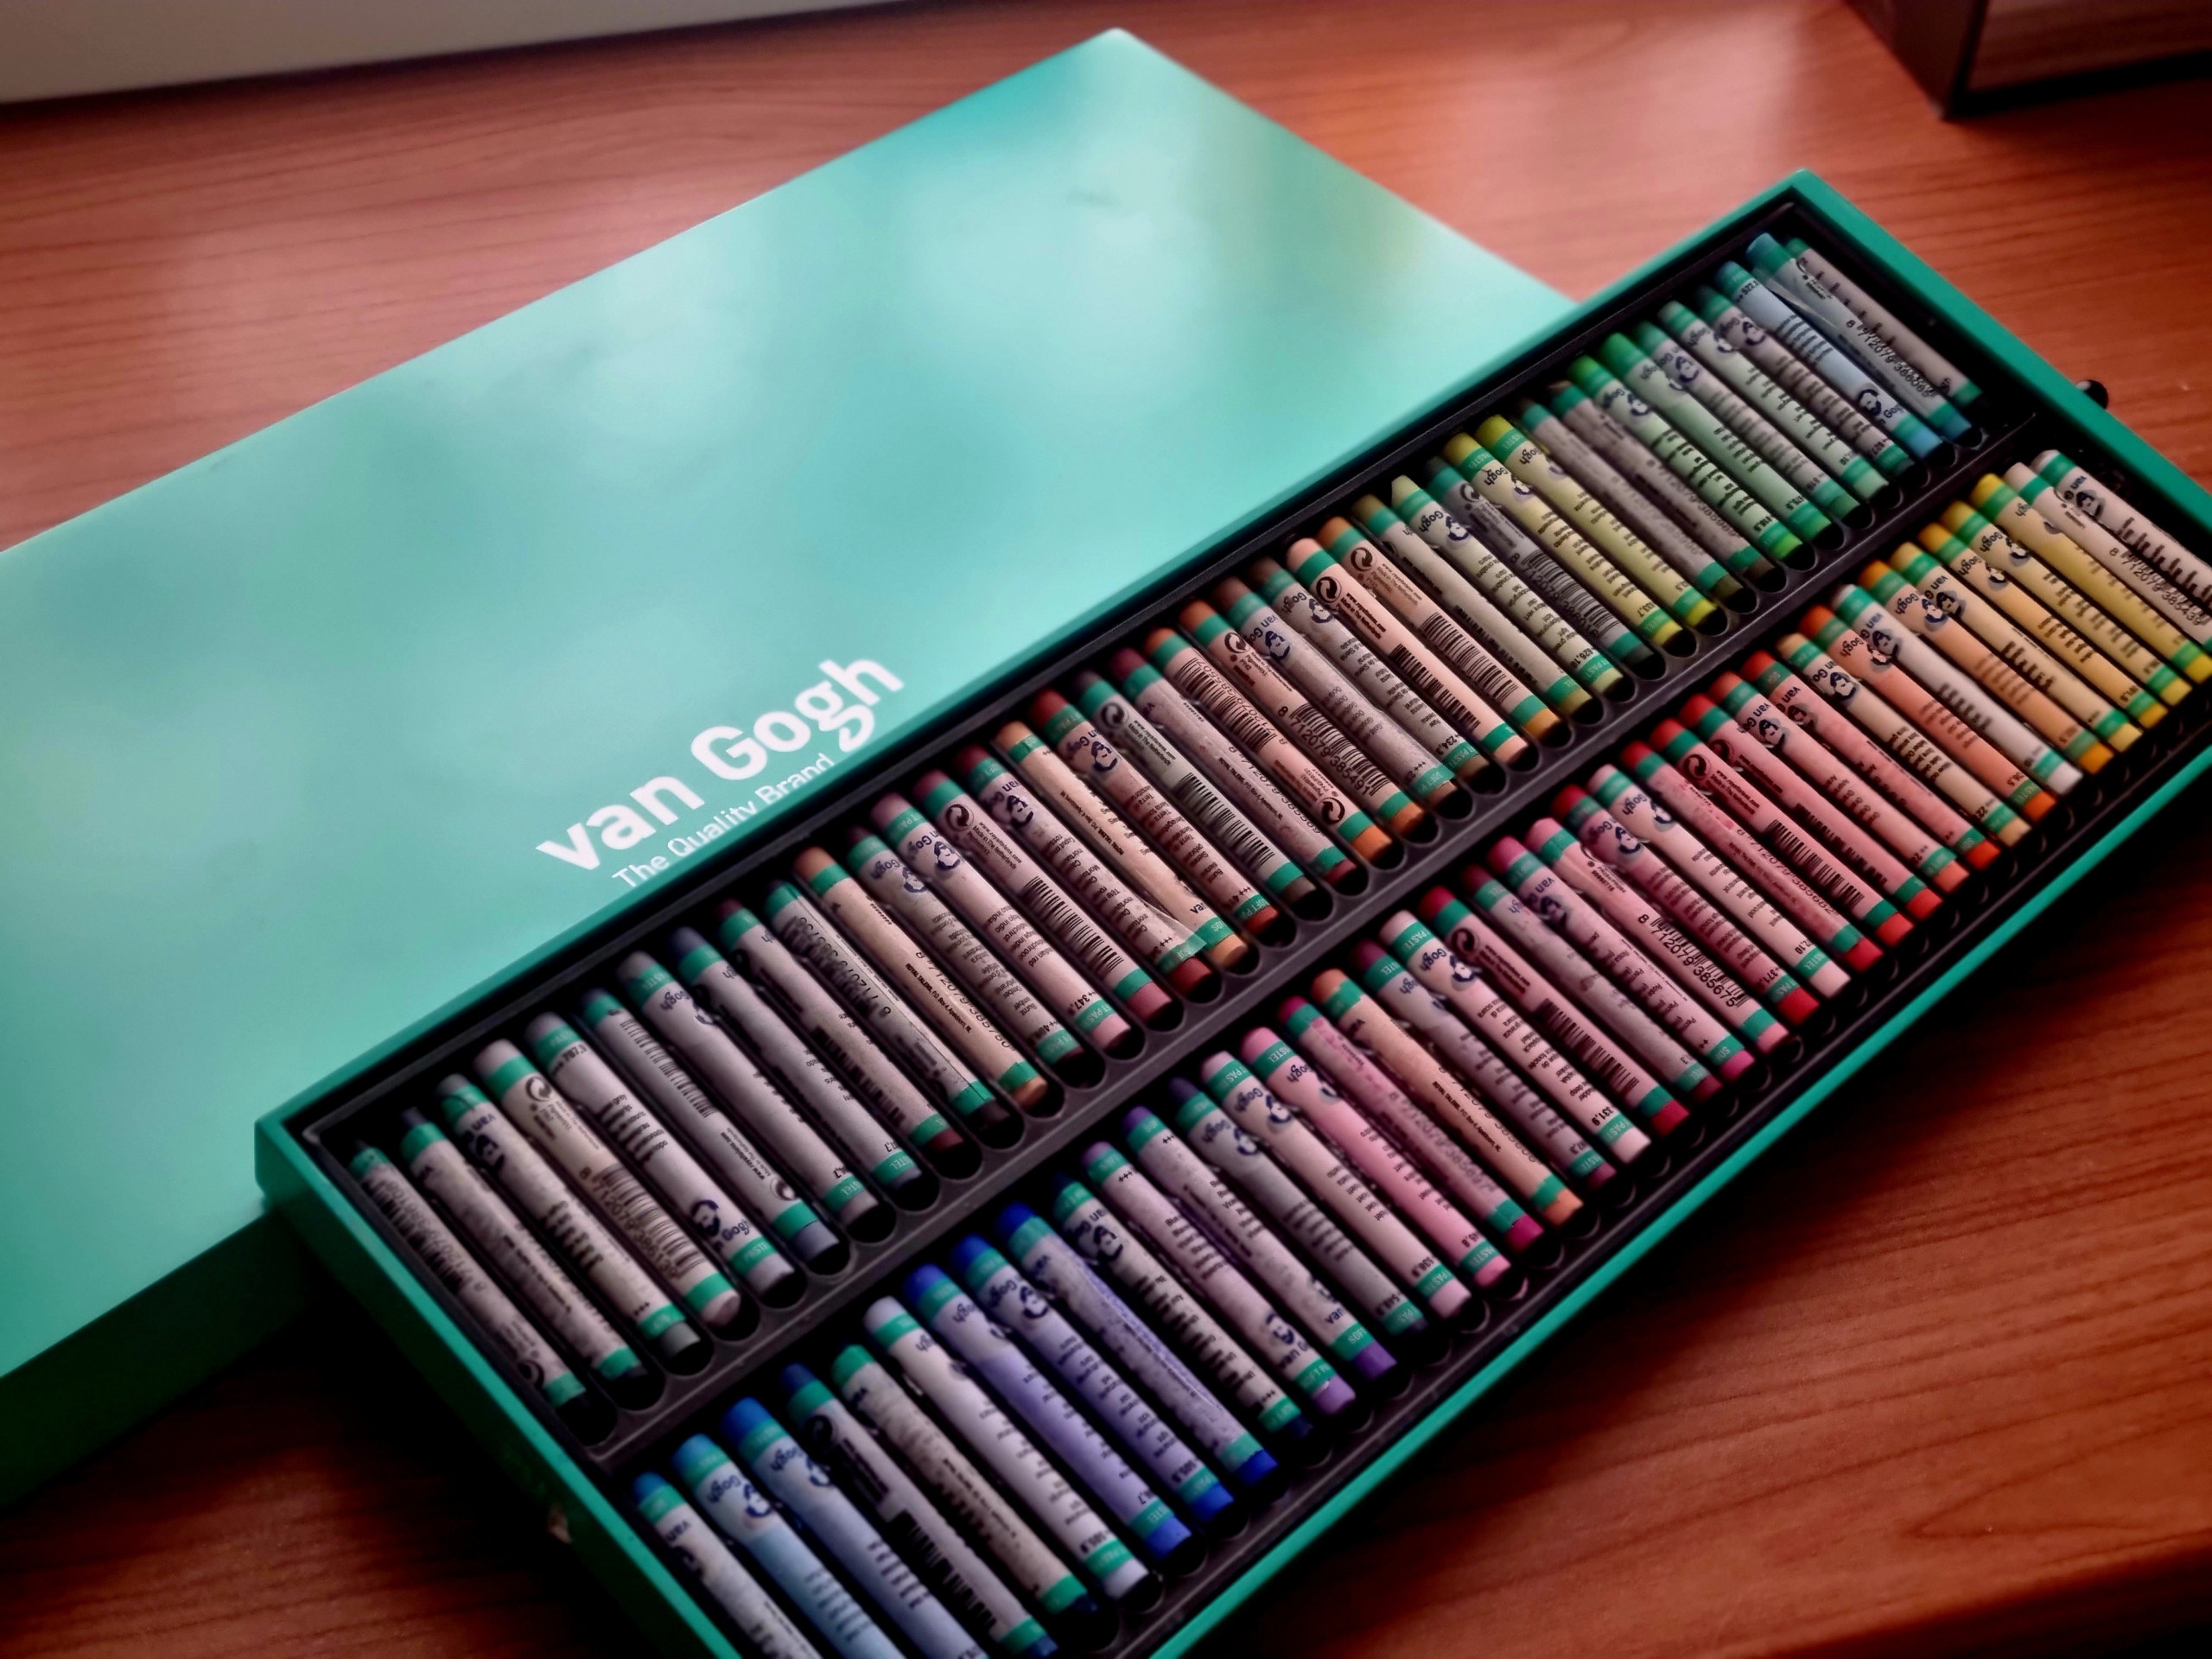
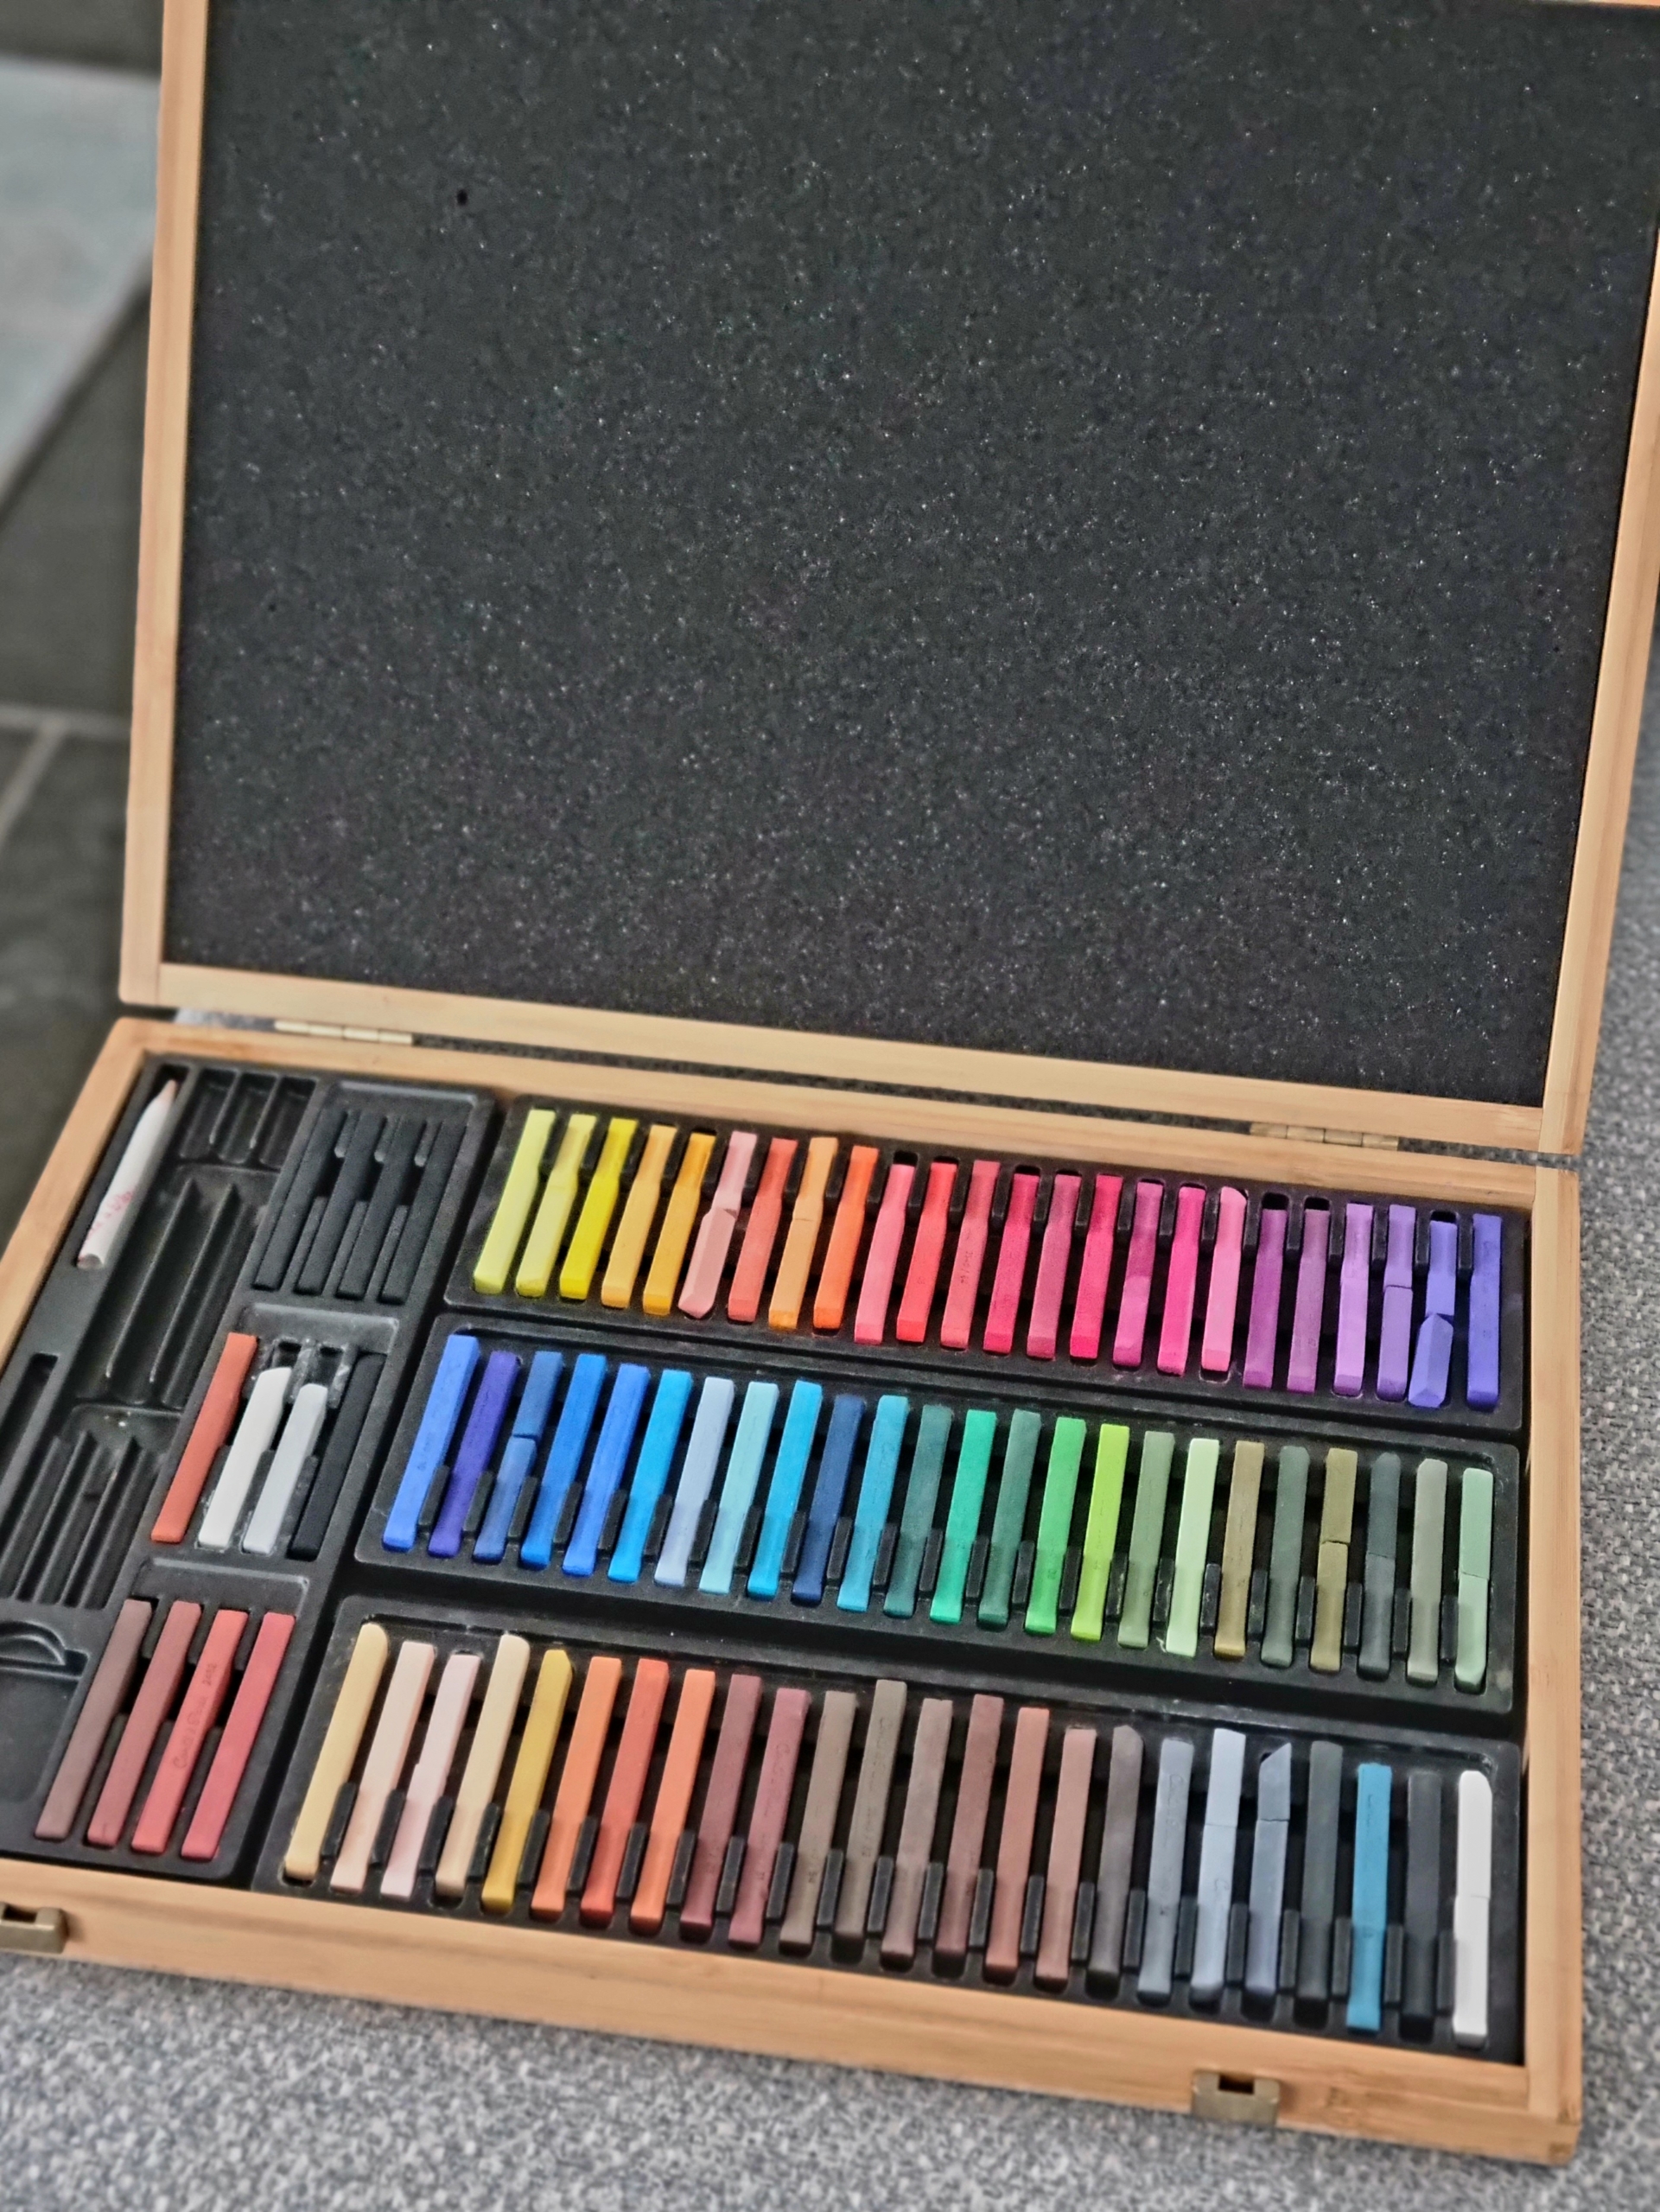
What pastel pencils have I?
I am so fortunate to have the full sets of:
- Faber Castell set of 60 About €95,00
- Creta color set of 72 About €150,00
- Stabilo Carbothello set of 60 About. €90,00
- van Gogh soft Pastel sticks set of 60 About €90,00
- Conte a Paris Pastel sticks set of 48 About €70,00
Some Derwents, Conte a Paris, Caran Dáche en Pan pastels
Talking of personal preferences, Faber Castell are definitely my favorite pastel pencils. Why? Because they were the first pencils I ever bought! And not only that they are a little bit harder so better for the delicate details. Pastel is also easier if you make a small mistake, you can easily add more layers.
I began with only plain pencils but ik took me forever to finnish a drawing, its real time consuming. Then I saw a YouTube video from Colin Bradley with pastel pencils, the Faber Castells Pitts and it was so fast! And it looked so easy, I bought the full set in a wooden box Wich I find quite attractive, and the rest is history. I began with a free tutorial from him, and it was not as easy as I thought, and it was messy but the result after a short while was in my eyes incredible! And the reason why I proceeded with it is quite simple. When I began, I was 54 and to reach my goals in this lifetime I had to speed things up in my opinion. I could never have so many drawings when I had stick to pencils.
To take your drawings to the next level
Why aren’t my pastel drawings like yours?
You’re struggling to get the pastel marks to show up at all, very frustrating. Meanwhile, I draw hair for hair detail with apparent ease, how frustrating…..
But most likely it is your paper; YOU NEED THE RIGHT PAPER!
I began with CANSON MEI TEINTES, great paper, great for blending but also extremely sensitive for stains and it takes only a couple of layers and has a structure that you can see through the pastel.
Then I found out pastelmat from Clairefontaine. It makes all the difference and there are multiple colors to choose from.

The property of the paper allows you to apply multiple layers, work from dark to light and draw exceptionally delicate details. with every new drawing I carefully look at all the colors and put them next to my photo. Because I mainly draw animals, this is usually brown or light gray/gray.
All 6 benefits in a row of pastelmat
*It has a light structure sow you don’t see it in your drawing
*Because the structure, the pastel holds very well
*This makes colors look better
*You can put many layers on it
*You don’t see the paper color through your work
*You don’t have to fixate
It’s not cheap… I buy the large sheets 50×70 cm and cut them or in four A4 or in two A3. This said there is Of course there is nothing wrong to practice on the cheaper ones then you learn the difference.
Do you need to fixate your pastelmat drawing?
NO!!!!
Fixative is like hairspray for pastel, from smudging. the wonderful thing about using pastelmat is you don’t need to. I did it once and it was totally ruined and discolored. Never used it again, my drawings where send to the other side of the world without a problem.
Final thought
I hope you find my tips of use for you and hope you like this blog post, let me know in the comments what you think of it and share your experiences.
I AM NOT SPONSORED
There are no comments